Planning and building SQL Server in RDS doesn’t have to scare you. It’s actually pretty easy and in this post will go over planning a SQL Server deployment in RDS, creating SQL Server in RDS, and last but not least configuring the new instance of SQL Server.
Let’s jump in…
Planning the deployment is important because if your SQL Server instance needs a feature that RDS doesn’t support, then RDS isn’t an option. Here are a few, but you can get the full list here: https://docs.aws.amazon.com/AmazonRDS/latest/UserGuide/CHAP_SQLServer.html
- Log Shipping
- SSRS, SSIS, SSAS, Data Quality Services, or Master Data Services
- Database Mail
- Maintenance Plans
- SQL Server Audit
- FILESTREAM support
- Policy-Based Management
- Replication
RDS also has some limitations that don’t exist with an on-premise SQL Server. Let’s look at a few:
- As of this post, Amazon only supports SQL 2017 RTM, SQL Server 2016 SP2, SQL Server 2014 SP2, SQL Server 2012 SP4, and SQL Server 2008R2 SP3
- You can only have a maximum of 30 databases per instance and 16TB of storage.
- Linked Servers
- Windows Authentication (must use AWS Managed Microsoft AD)
Again, the full list can be found here: https://docs.aws.amazon.com/AmazonRDS/latest/UserGuide/CHAP_SQLServer.html
Pricing
Once you can verify that your environment will run properly in RDS you’ll need to look at the pricing model. When you setup RDS for SQL Server, the software license is included. AWS used to have a program called “Bring your own license” or “BYOL”, which allowed you to use a license that was already bought from Microsoft via an agreement or other. This has been rumored to expire on June 30, 2019. The software license that is included means that you don’t need to purchase SQL Server licenses separately. AWS holds the license for the SQL Server database software. Amazon RDS pricing includes the software license, underlying hardware resources, and Amazon RDS management capabilities. The pricing will depend on the selections such as size, edition, etc.
The following editions are supported in RDS:
- Enterprise
- Standard
- Web
- Express
Notice, Developer Edition is not included with RDS and Web Edition supports only public and internet-accessible webpages, websites, web applications, and web services.
Instance Type
You can also choose from On-demand or reserved instances. On-Demand DB Instances let you pay for compute capacity by the hour your DB Instance runs with no long-term commitments. This frees you from the costs and complexities of planning, purchasing, and maintaining hardware and transforms what are commonly large fixed costs into much smaller variable costs. This is good for development environments where you can power on and off the server as it’s being used.
Reserved Instances give you the option to reserve a DB instance for a one or three year term and in turn receive a significant discount compared to the On-Demand Instance pricing for the DB instance. Amazon RDS provides three RI payment options — No Upfront, Partial Upfront, All Upfront — that enable you to balance the amount you pay upfront with your effective hourly price.
You can see more about on-demand vs reserved instances and pricing here: https://aws.amazon.com/rds/sqlserver/pricing/
RDS provides a selection of instance types optimized to fit different relational database use cases. Instance types comprise varying combinations of CPU, memory, storage, and networking capacity and give you the flexibility to choose the appropriate mix of resources for your database. Each instance type includes several instance sizes, allowing you to scale your database to the requirements of your target workload. View more details here: https://aws.amazon.com/rds/instance-types/
Storage
Another item to look at when planning your deployment is storage. RDS uses Amazon Elastic Block Store (Amazon EBS) volumes for database and log storage. Depending on the amount of storage requested, Amazon RDS automatically stripes across multiple Amazon EBS volumes to enhance performance.
RDS offers three different storage types:
General Purpose SSD – also called gp2, this storage type offers cost-effective storage that can be used for a broad range of different workloads. These volumes deliver single-digit millisecond latencies and the ability to burst to 3,000 IOPS for extended periods of time. I would recommend putting small to medium sized databases on this type.
Provisioned IOPS – This storage type is designed for I/O intensive workloads, particularly database workloads that require low I/O latency and consistent throughput. This is also built on SSD and targeted for IO intensive, high performance databases. Cost wise, this is the highest of the three storage types.
Magnetic – This storage type is mostly used for backward compatibility. Amazon recommends using gp2 or Provisioned IOPS for any new builds. This is ideal for test and dev environments when performance isn’t a concern. This is the cheapest of the three storage types.
See more about storage here: https://docs.aws.amazon.com/AmazonRDS/latest/UserGuide/CHAP_Storage.html
Network
One more item to consider when planning the deployment is network connectivity. Applications will more than likely need to connect to your RDS environment so there are a few import concepts to look at it.
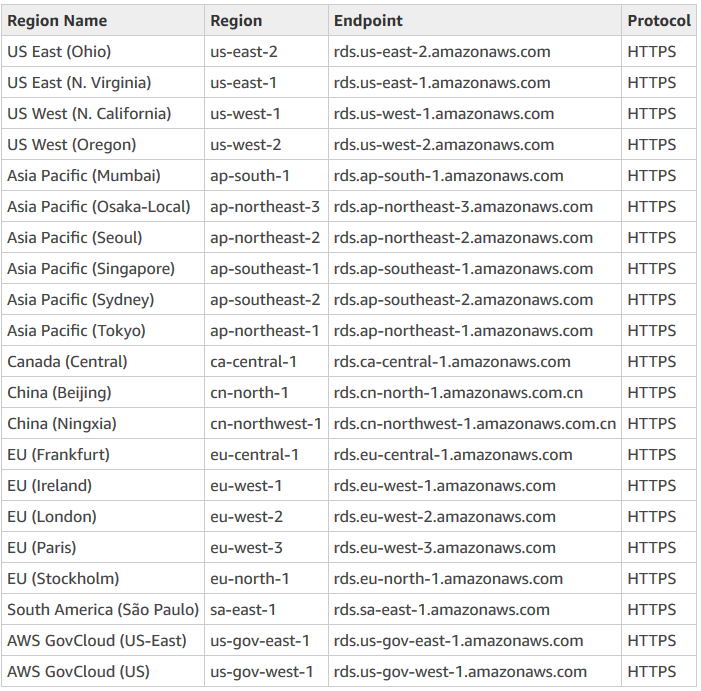
Availability Zones – this is simply a data center in an AWS region. The following AWS regions exist.
Virtual Private Cloud – also called VPC, this is an isolated virtual network that can span multiple Availability Zones. It’s used to group different types of resources to the network that need to talk to each other.
Virtual Private Cloud – also called VPC, this is an isolated virtual network that can span multiple Availability Zones. It’s used to group different types of resources to the network that need to talk to each other.
DB Subnet Group – this is a collection of subnets inside a VPC that contains the RDS instance addresses. See more about VPC and DB subnet groups here: https://docs.aws.amazon.com/AmazonRDS/latest/UserGuide/USER_VPC.WorkingWithRDSInstanceinaVPC.html
Create SQL Server RDS via AWS Console
Now that we’ve outlined some of the deployment planning tasks, let’s build an instance through the AWS console.
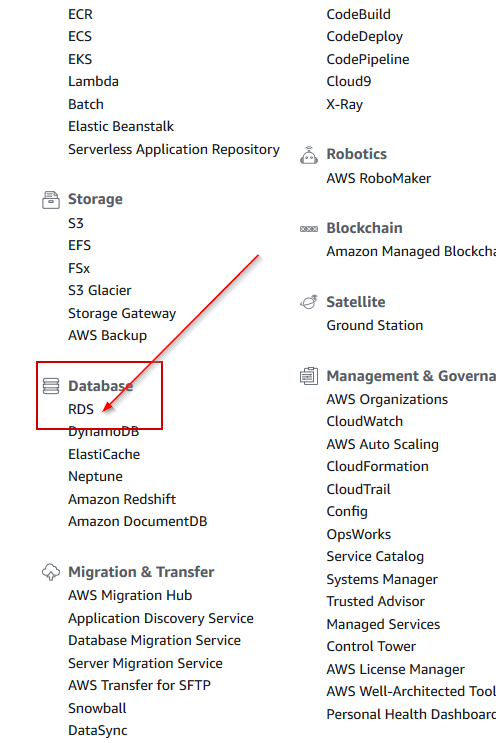
Once inside the console, we’ll click on RDS under the Database heading:
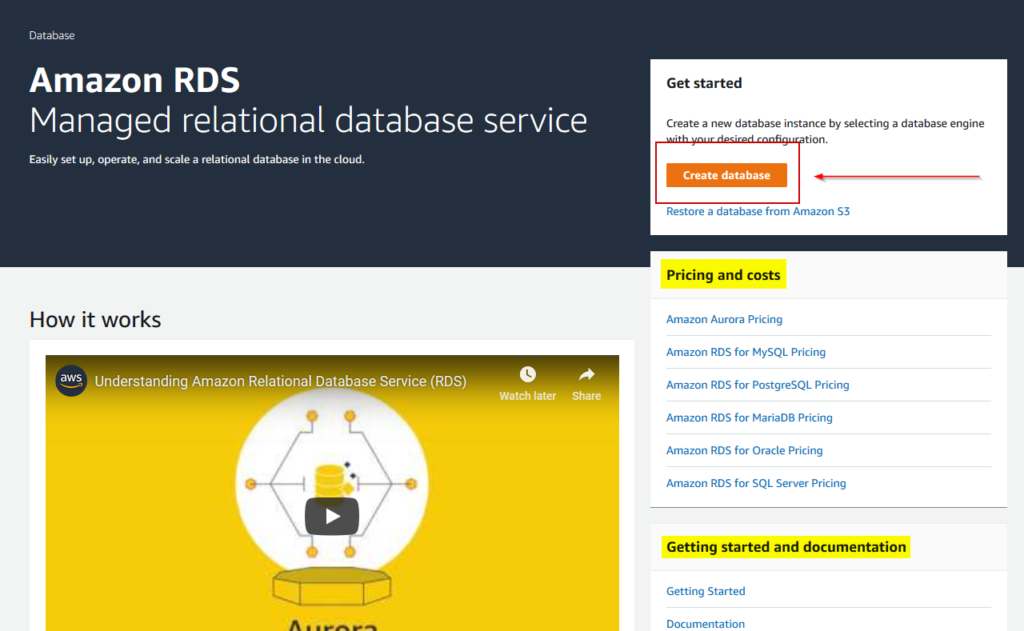
Once we are on the home page for RDS, we can click Create Database under Get Started. There’s also info for Pricing and costs and some documentation on getting started:
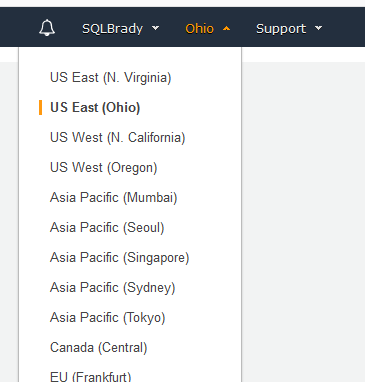
Notice in the top right corner is the Availability Zone in which you are logged into. In my case, I’m logged into US East (Ohio) since I’m on the Central Time Zone and Ohio is located closer to me than any other zone:
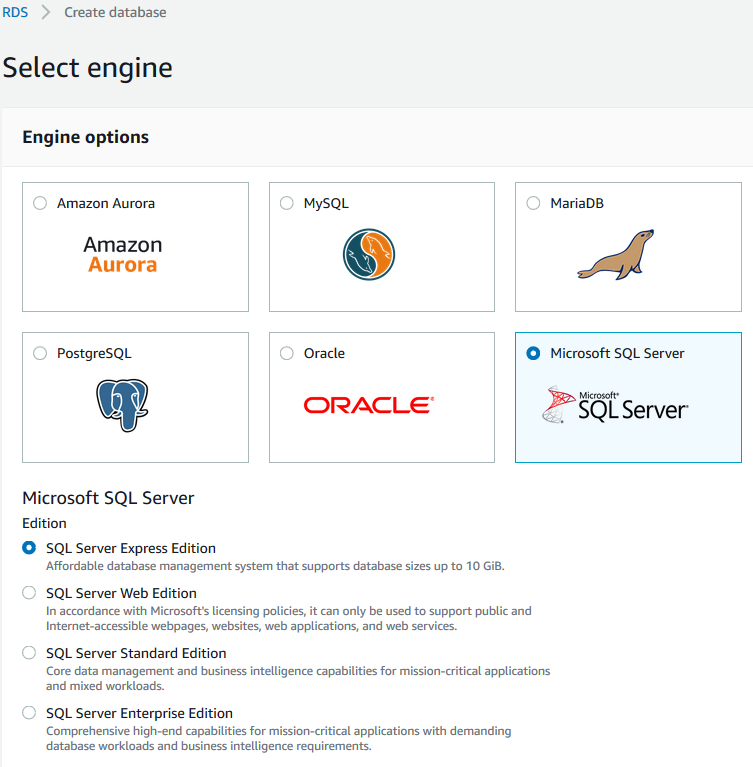
Back to the Select Engine page. For this post, I’m going to install Microsoft SQL Server Express, but you can see the other database engine platforms that are available and the associated editions:
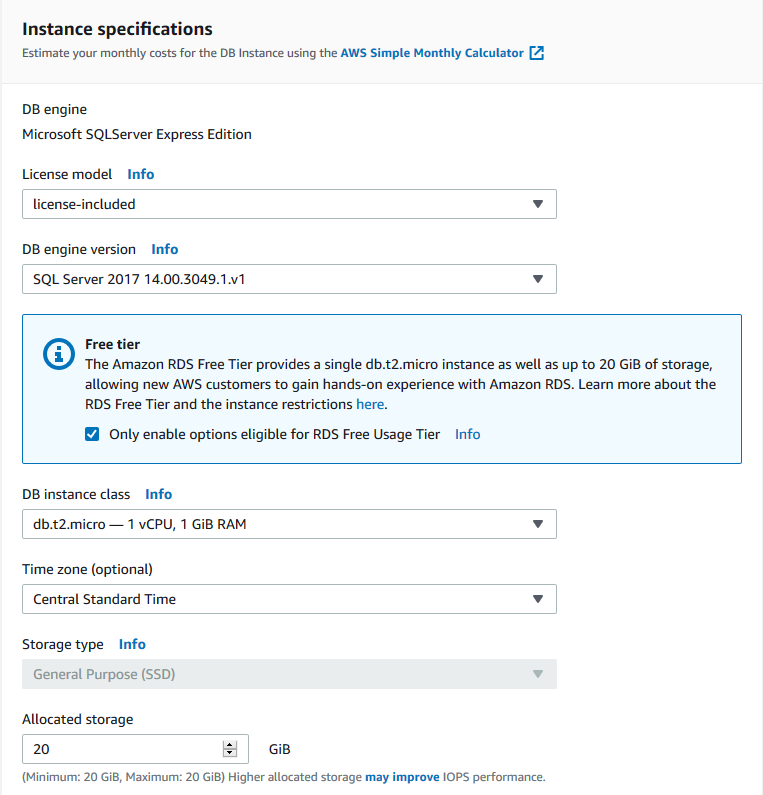
Next page we can see some of our database details. There are all items we discussed in the planning deployment section above. License model, DB engine version, DB instance class, Time Zone, Storage Type and allocated storage are all configurable on this page. Below are my selections:
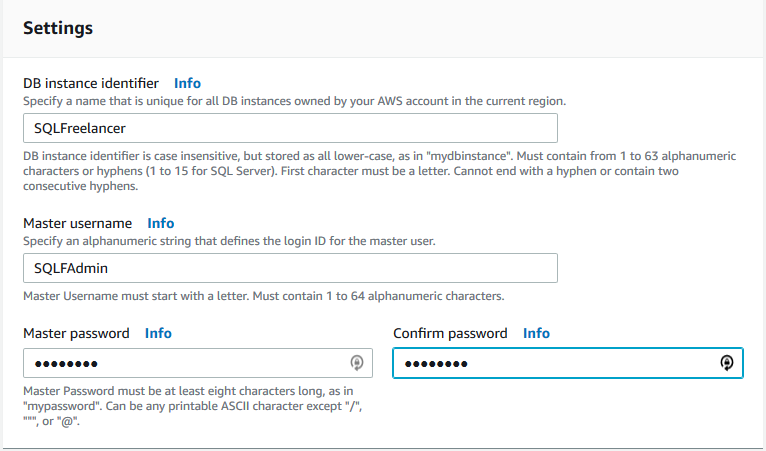
Scroll down to Settings header and configure the DB instance identifier, Master username and password. The DB instance identifier is a unique name for your DB instances across the current region. For this RDS instance I’ll name it SQLFreelancer:
On the Advanced Settings page we’ll configure Network and Security, Windows Authentication, Database Options such as port number, Encryption (where available), Backup retention, Monitoring, Performance Insights, Maintenance options, and Deletion protection. I’m going to choose all the defaults for this post, but this is a page where you want to make sure you choose what is best for your environment.
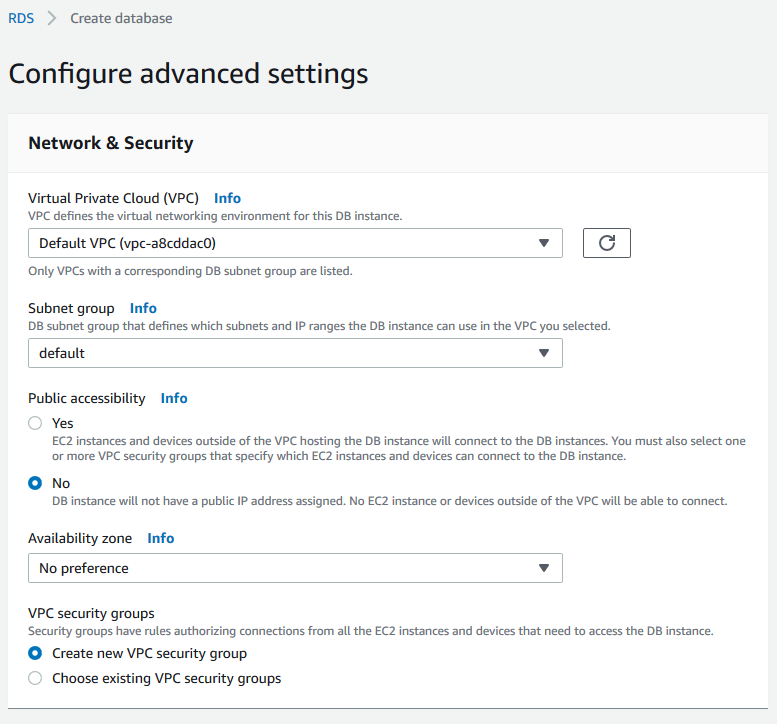
Once you are finished on the Advanced Settings page, click Create Database.

Now how easy was that? Creating a new DB instance took about 2 minutes. Once your instance is created let’s click on View DB Instance details:
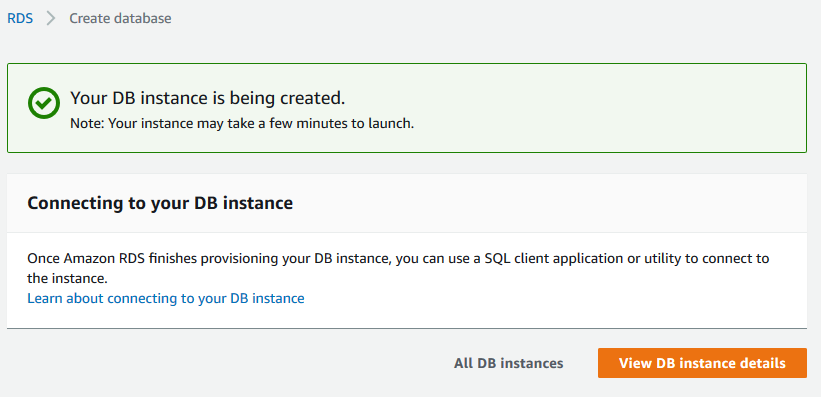
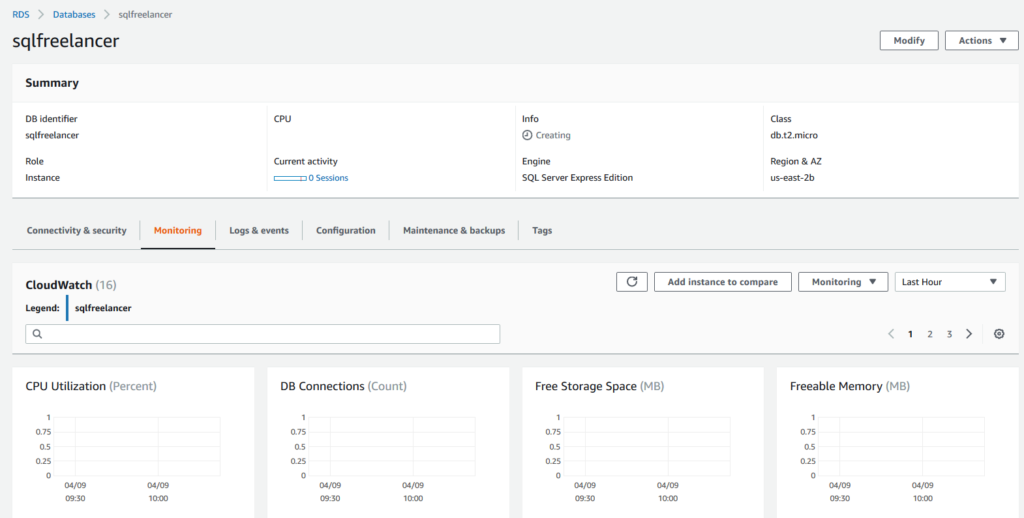
The details page gives you all sorts of info about your instance:
