Quick Backup/Restore Script

Throughout the years I’ve probably performed hundreds if not thousands of migrations or “refreshes” to lower environments. It’s pretty simple to run a quick maintenance plan or SQL job to backup all databases, but the more complex piece is creating a restore script to point to that backup location and the backup name. It can be done, but it takes a little longer, IMO. A lot of backup file names contain numeric characters such as date or time of backup.

John Morehouse created a dynamic script that simplifies everything and it can be easily modified to fit particular needs. I’ve had this script bookmarked for years and use it at least once a week. Kudos to John for sharing this with the SQL community. I’ll link the script below, but here’s a quick snippet.

DECLARE @date CHAR(8)
SET @date = (SELECT CONVERT(char(8), GETDATE(), 112))

DECLARE @path VARCHAR(125)
SET @path = '\\UNCPath\Folder\'

;WITH MoveCmdCTE ( DatabaseName, MoveCmd )
          AS ( SELECT DISTINCT
                        DB_NAME(database_id) ,
                        STUFF((SELECT   ' ' + CHAR(13)+', MOVE ''' + name + ''''
                                        + CASE Type
                                            WHEN 0 THEN ' TO ''D:\SQLData\'
                                            ELSE ' TO ''E:\SQLTLogs\'
                                          END
                                        + REVERSE(LEFT(REVERSE(physical_name),
                                                       CHARINDEX('\',
                                                              REVERSE(physical_name),
                                                              1) - 1)) + ''''
                               FROM     sys.master_files sm1
                               WHERE    sm1.database_id = sm2.database_ID
                        FOR   XML PATH('') ,
                                  TYPE).value('.', 'varchar(max)'), 1, 1, '') AS MoveCmd
               FROM     sys.master_files sm2
  )
SELECT
	'BACKUP DATABASE ' + name + ' TO DISK = ''' + @path + '' + name + '_COPY_ONLY_' + @date + '.bak'' WITH COMPRESSION, COPY_ONLY, STATS=5',
	'RESTORE DATABASE '+ name + ' FROM DISK = ''' + @path + '' + name + '_COPY_ONLY_' + @date + '.bak'' WITH RECOVERY, REPLACE, STATS=5 ' + movecmdCTE.MoveCmd
FROM sys.databases d
	INNER JOIN MoveCMDCTE ON d.name = movecmdcte.databasename
WHERE d.name LIKE '%DatabaseName%'
GO

To change the backup/restore path you can modify this section of code to fit your needs:

SET @path = '\\UNCPath\Folder\'

Another modification I perform initially is changing the where clause, for example, if I don’t want system databases I can change:

WHERE d.name LIKE '%DatabaseName%'

to

WHERE d.database_id > 4

A lot of times I don’t need to move the data and log files to a new location because I’m overwriting other databases so I just comment all of the MoveCmdCTE CTE code out:

DECLARE @date CHAR(8)
SET @date = (SELECT CONVERT(char(8), GETDATE(), 112))

DECLARE @path VARCHAR(125)
SET @path = '\\UNCPath\Folder\'

--;WITH MoveCmdCTE ( DatabaseName, MoveCmd )
--          AS ( SELECT DISTINCT
--                        DB_NAME(database_id) ,
--                        STUFF((SELECT   ' ' + CHAR(13)+', MOVE ''' + name + ''''
--                                        + CASE Type
--                                            WHEN 0 THEN ' TO ''D:\SQLData\'
--                                            ELSE ' TO ''E:\SQLTLogs\'
--                                          END
--                                        + REVERSE(LEFT(REVERSE(physical_name),
--                                                       CHARINDEX('\',
--                                                              REVERSE(physical_name),
--                                                              1) - 1)) + ''''
--                               FROM     sys.master_files sm1
--                               WHERE    sm1.database_id = sm2.database_ID
--                        FOR   XML PATH('') ,
--                                  TYPE).value('.', 'varchar(max)'), 1, 1, '') AS MoveCmd
--               FROM     sys.master_files sm2
--  )
SELECT
	'BACKUP DATABASE ' + name + ' TO DISK = ''' + @path + '' + name + '_COPY_ONLY_' + @date + '.bak'' WITH COMPRESSION, COPY_ONLY, STATS=5',
	'RESTORE DATABASE '+ name + ' FROM DISK = ''' + @path + '' + name + '_COPY_ONLY_' + @date + '.bak'' WITH RECOVERY, REPLACE, STATS=5 ' --+ movecmdCTE.MoveCmd
FROM sys.databases d
	--INNER JOIN MoveCMDCTE ON d.name = movecmdcte.databasename
WHERE d.name LIKE '%DatabaseName%'
GO

There’s a lot of option here and this script is quick and easy.

Link to script: https://gist.github.com/airtank20/a826c6f37439482edd5070e8aaeb1ee1

Introducing SIOS high availability for SQL Server 2008/R2 in Azure

Support for SQL Server 2008 and 2008 R2 ended on July 9, 2019. That means the end of regular security updates. However, if you move those SQL Server instances to Azure or Azure Stack, Microsoft will give you three years of extended security updates at no additional cost. If you’re currently running SQL Server 2008 or 2008 R2 and you are unable to update to a later version of SQL Server, you will want to take advantage of this offer rather than running the risk of facing a future security vulnerability. An unpatched instance of SQL Server could lead to data loss, downtime, or a devastating data breach.

If you have a SQL Server failover cluster instance (FCI) or use hypervisor-based high availability, or other clustering technology on-premises for high availability, you’ll probably need the same in Azure. If you need to migrate to Azure/Azure Stack at end of support, and you require high availability for SQL Server 2008/2008 R2, there’s only one solution recommended by Microsoft: SIOS DataKeeper. SIOS DataKeeper enables clustering in the cloud, including the creation of a SQL Server 2008/2008 R2 failover cluster instance, allowing you to achieve your high availability goals.

Click here to view the rest of this post.

What’s new in SQL Server 2019

SQL Server 2019 preview builds on previous releases to grow SQL Server as a platform that gives you choices of development languages, data types, on-premises or cloud, and operating systems. This article summarizes what is new for SQL Server 2019. For more information and known issues, see the SQL Server 2019 Release Notes.

Try SQL Server 2019!

CTP 2.0

Community technology preview (CTP) 2.0 is the first public release of SQL Server 2019 preview. The following features are added or enhanced for SQL Server 2019 preview CTP 2.0.

Click here to view the rest of this post.

Downgrade from SQL Server Enterprise Edition to Standard Edition

I’ve came across a lot of SQL Server’s in my career that were installed using the Enterprise Edition and never utilized the Enterprise features. Downgrading to a lower edition cannot be done in place. This tip will describe the steps needed to downgrade.

Create Database Backups

As always, before doing anything drastic (or non-drastic), BACKUP all the databases (system and user)! Also, if you have a development environment, please test on it first.

Check for Enterprise features

After backing up the databases run the following query on each database:

SELECT * FROM sys.dm_db_persisted_sku_features

This DMV will tell you whether or not the database is utilizing any of the Enterprise features.

Check Version and Build Number

Because you never know when an install may fail, check the version and build number of the current SQL Server. After the downgrade, you will need to bring the new SQL Server back to the patch level. You can view this information by executing the following command:

SELECT @@VERSION

SQL Freelancer SQL Server Downgrade Edition

Save the results to a text editor.

Decision…

There are two different directions we can go from here.

  1. We can do the traditional uninstall Enterprise, install Standard, patch, restore databases
  2. Or we can do what I call “The Jonathan Kehayias” approach. (I saw this method awhile back from a forum post by Jonathan):

Copy System Databases

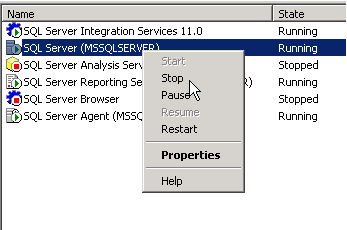
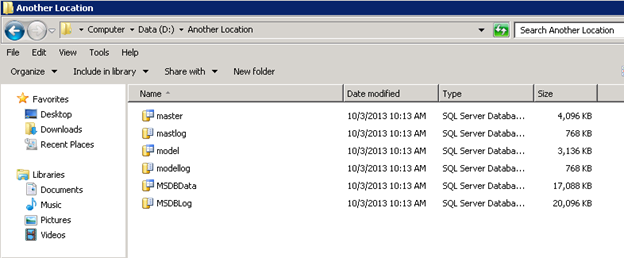
Shutdown the SQL Server service and copy the master, model and msdb database files (.mdf and .ldf) to another location. We will need these later:

SQL Freelancer SQL Server Downgrade EditionSQL Freelancer SQL Server Downgrade Edition

Uninstall SQL Server

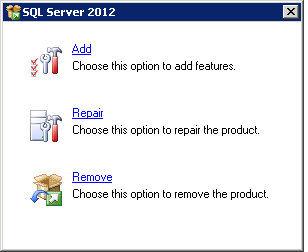
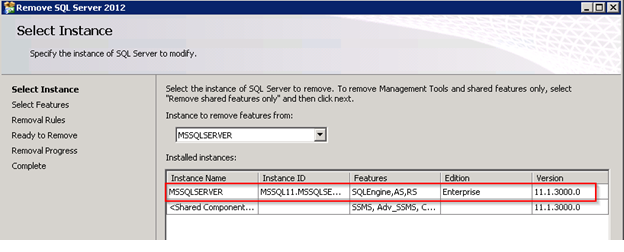
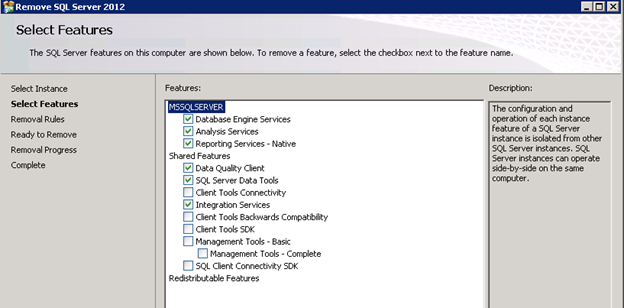
Uninstall SQL Server from Control Panel:

SQL Freelancer SQL Server Downgrade Edition

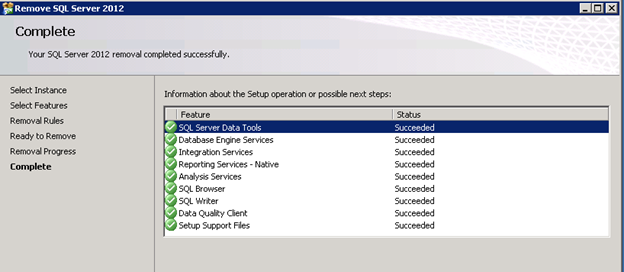
You only need to uninstall the Instance (includes SSIS, SSAS, SSRS, SSDT). There is no need to uninstall the Shared Components (SSMS, Client Tools, and Connectivity).

SQL Freelancer SQL Server Downgrade EditionSQL Freelancer SQL Server Downgrade EditionSQL Freelancer SQL Server Downgrade Edition

Reboot

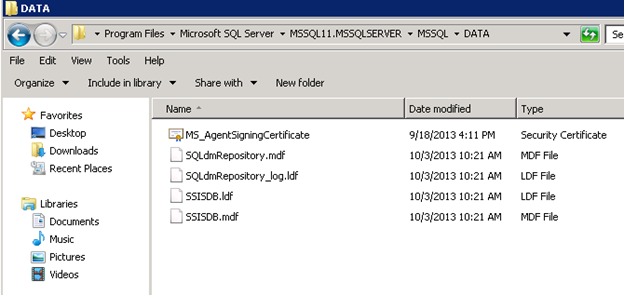
Reboot the server. After rebooting, browse to the location of the data files and you will notice that the user databases weren’t removed with the uninstall, but the system databases were. This is why we copied them in the step above:

SQL Freelancer SQL Server Downgrade Edition
Click here to view the rest of this post.