Create Always Encrypted Certificate

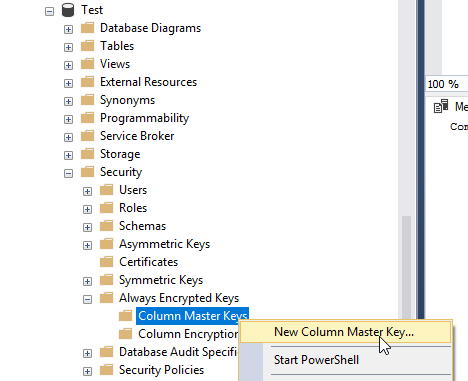
In SSMS, browse to Database, Security, Always Encrypted Keys, right click Column Master Keys and click New Column Master Key:

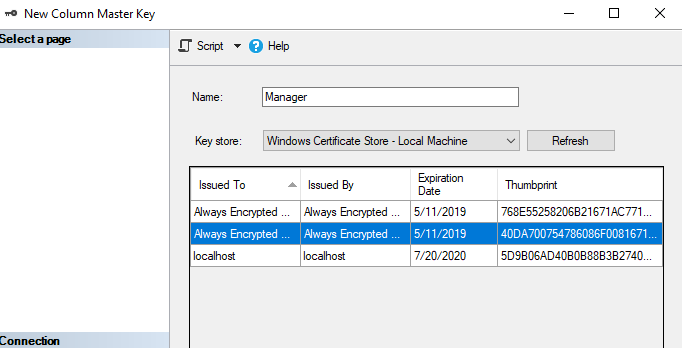
In the New Column Master Key box you can choose from several key stores. The most popular stores are Current User or Current Machine. See below for description.

Local machine certificate store
This type of certificate store is local to the computer and is global to all users on the computer. This certificate store is located in the registry under the HKEY_LOCAL_MACHINE root.

Current user certificate store
This type of certificate store is local to a user account on the computer. This certificate store is located in the registry under the HKEY_CURRENT_USER root.

Be aware that all current user certificate stores inherit the contents of the local machine certificate stores. For example, if a certificate is added to the local machine Trusted Root Certification Authorities certificate store, all current user Trusted Root Certification Authorities certificate stores also contain the certificate.

In this example, we’ll use Local Machine. Type a name for the Master Key, choose Key Store and click Generate Certificate.

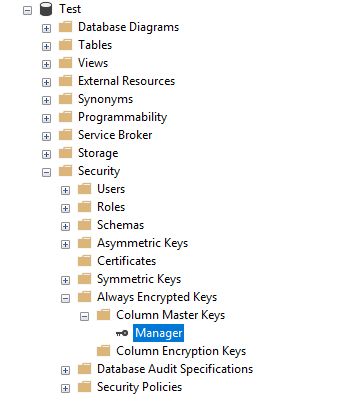
Click OK and a new Column Master Key will appear:

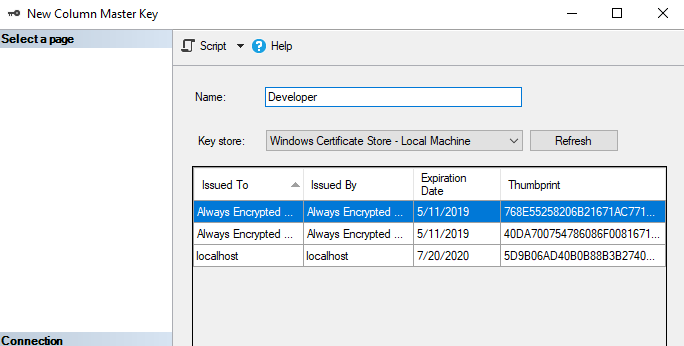
Do the same for any other master keys you would like to create. For example, Developer:
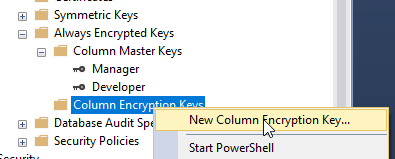
To create a Column Encryption Key, right click on Column Encryption Key and choose New Column Encryption key:

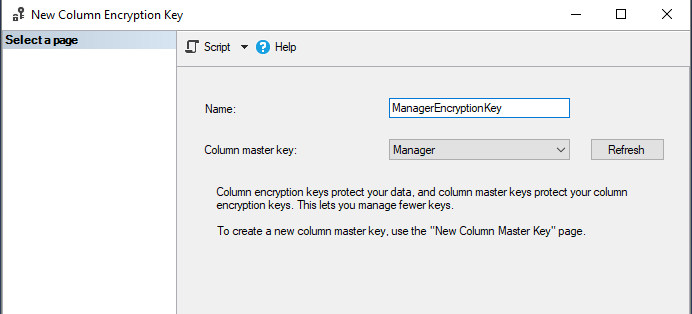
Give the key a name and select the Column Master Key that you would like to associate it with:

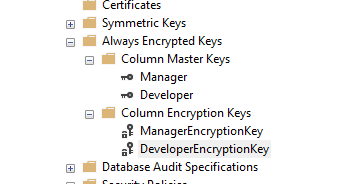
Do the same for the Developer keys. You should have two column master keys and two column encryption keys:

To view Local Machine certificates:

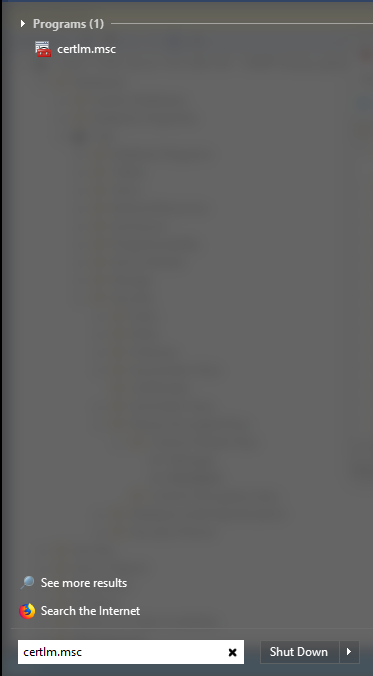
Open Certlm.msc

Browse to Personal, Certificates:

Double click a certificate and go to the Detail tab where you will see the thumbprint:

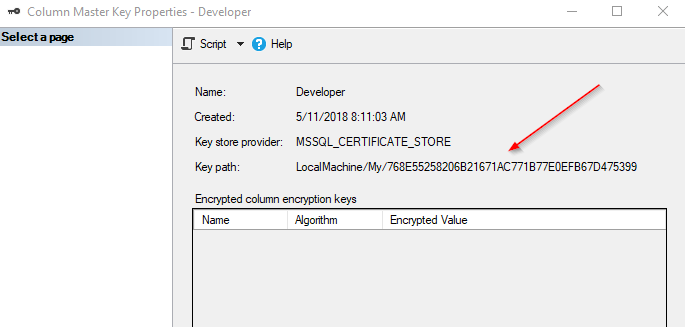
Match this thumbprint with the Column Master Key in SSMS:

Right click the certificate in Certlm.msc and choose Properties. Enter a friendly name to identify which certificate belongs with the Column Master Key.

To Export and certificate, right click and choose All Tasks, Export:

Identify SQL Server databases that are no longer in use

I have come across this problem a few different times in my career. I’ll change jobs and they’ll be numerous database servers that I inherit that I know nothing about. It’s a process to learn what each server does, what applications use them, and what databases are no longer used and can be removed.

There is no “tried and true” method to knowing if a database is truly no longer used, but I have three different suggestions that may help with your research. These suggestions are all based around capturing user connections.

SQL Server User Connection Count

One suggestion to finding orphan databases is to get connection counts. In most cases, if a database has zero user connections over a long period of time, it may be time to look into removing this database. The following query will capture server name, database name, number of connections, and time the query was executed and it will also filter out system databases because they are needed:

SELECT @@ServerName AS server
 ,NAME AS dbname
 ,COUNT(STATUS) AS number_of_connections
 ,GETDATE() AS timestamp
FROM sys.databases sd
LEFT JOIN sysprocesses sp ON sd.database_id = sp.dbid
WHERE database_id NOT BETWEEN 1 AND 4
GROUP BY NAME

SQL Freelancer SQL Server Database Connections

I’m using a server named BUADMIN for this example. As you can see I have 3 active connections to the database SQLCensus. This is a good indication that this database is in use. MonitorDB and SSISDB have 0 connections, so I may need to monitor them further. The easiest way to monitor these databases is to create a stored procedure using this query so I can schedule it. You can also put this query directly into a SQL Server Agent Job and set a schedule.

Before setting a schedule, you will need to create a table that will hold the results. To create a table using the following code:

SET ANSI_NULLS ON
GO
SET QUOTED_IDENTIFIER ON
GO
CREATE TABLE [dbo].[Connections](
 [server] [nvarchar](130) NOT NULL,
 [name] [nvarchar](130) NOT NULL,
 [number_of_connections] [int] NOT NULL,
 [timestamp] [datetime] NOT NULL
) ON [PRIMARY]
GO

Next, create a stored procedure that will INSERT the results into the table:

SET ANSI_NULLS ON
GO
SET QUOTED_IDENTIFIER ON
GO
CREATE PROCEDURE usp_ConnectionsCount 
AS
BEGIN
 SET NOCOUNT ON;
INSERT INTO Connections 
  SELECT @@ServerName AS server
 ,NAME AS dbname
 ,COUNT(STATUS) AS number_of_connections
 ,GETDATE() AS timestamp
FROM sys.databases sd
LEFT JOIN master.dbo.sysprocesses sp ON sd.database_id = sp.dbid
WHERE database_id NOT BETWEEN 1
  AND 4
GROUP BY NAME
END

Once the stored procedure is created you can create a SQL Server Agent Job and set it to run on a schedule. I’ll set it to run every 10 minutes.

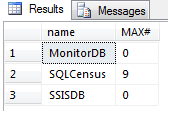
Let this run a few days, a few months or however long you think is appropriate and then go back and examine the results. Once you are happy with the timeframe chosen, use the following query to select the MAX number of connections per database:

SELECT NAME
 ,MAX(number_of_connections) AS MAX#
FROM Connections
GROUP BY NAME

SQL Freelancer SQL Server Database Connections

From here you will be able to determine if any databases have not had a user connection in the timeframe specified.

Detailed SQL Server Connection Information

The above suggestion is good if you just need connection counts. However, sometimes a count isn’t good enough. Sometimes you need to know exactly what is connecting. This suggestion helps in that aspect.

It’s basically setup the same way, create a stored procedure, insert data into a table, set a schedule and examine the results.

The following query gives you more information:

SELECT @@ServerName AS SERVER
 ,NAME
 ,login_time
 ,last_batch
 ,getdate() AS DATE
 ,STATUS
 ,hostname
 ,program_name
 ,nt_username
 ,loginame
FROM sys.databases d
LEFT JOIN sysprocesses sp ON d.database_id = sp.dbid
WHERE database_id NOT BETWEEN 0
  AND 4
 AND loginame IS NOT NULL

SQL Freelancer SQL Server Database Connections
Click here to view the rest of this post.