SQL Server has produced some excellent High Availability options, but I was looking for an option that would allow me to access my secondary database without it being read-only or in restoring mode. I need the ability to see transactions occur and query the secondary database.
Enter SQL Server 2012 AlwaysON High Availability Groups.
The new AlwaysOn feature combines the powers of clustering and mirroring into one High Availability option, but also allows you to interact with the secondary databases something that clustering and mirroring do not allow. In addition, AlwaysOn Availability Groups allows you to configure failover for one database, a set of databases or the entire instance again something you could not do with database mirroring. Another feature is that you can create multiple failover targets where in the past database mirroring only allowed one failover partner.
In this tip I’ll show you a basic look at how to setup SQL Server 2012 AlwaysON Availability Groups. Note that this tip is separated into 2 parts: Part 1 will consist of installing and configuring the prerequisites for AlwaysOn and Part 2 will consist of setting up the Availability Groups and showing how they work.
Let’s get started…
Environment: I have setup two separate VM’s running in VM Workstation with Windows 2008 R2 Enterprise Edition and SQL Server 2008 R2 Enterprise named Denali and Denali2.
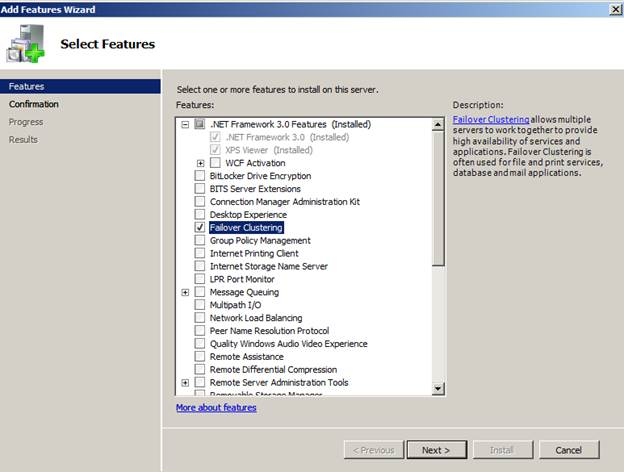
First thing we need to do is make sure both servers have .NET Framework 3.0 Features and Failover Clustering installed. To do this, go to Server Manager, Features, Add Feature. Check .NET Framework 3.0 and Failover Clustering and Install as shown below.
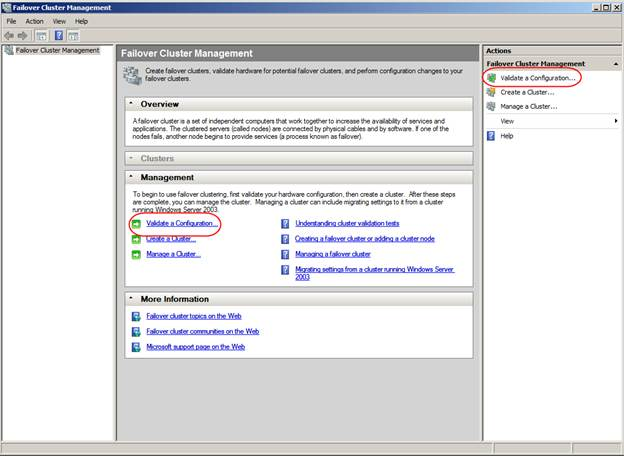
Once .NET and Failover Clustering are installed we can configure the cluster. Go to Control Panel, Administrative Tools, Failover Cluster Manager and click Validate a Configuration.
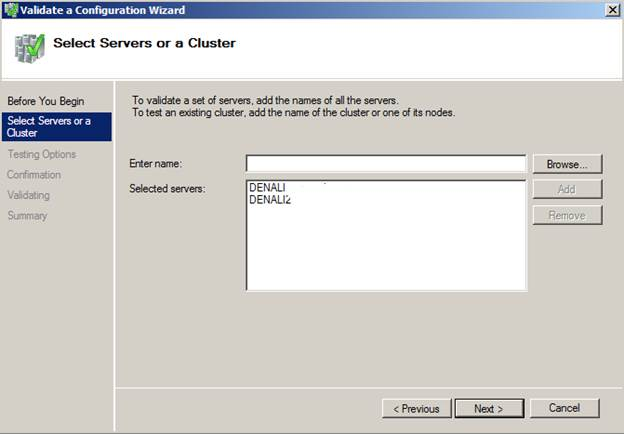
 On the “Validate A Configuration Wizard” page click Next, then enter the names of the SQL Servers you want to configure. In this example we are using Denali and Denali2.
 Click Next to run through some validation tests. If you receive any errors click View Report to view the errors.
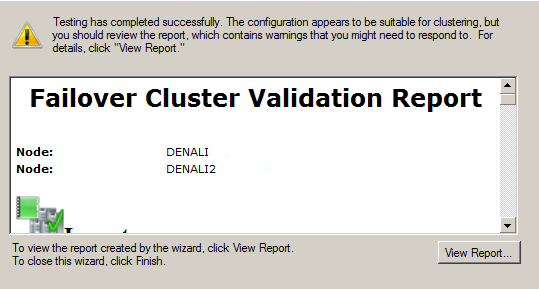 As you can see from above I received errors on my validation, because I am only using one network card. This means I have a single point of failure. In a production environment you would want to fix this, but this is only a warning and does not stop us from configuring clustering. From the main screen click “Create a Cluster”
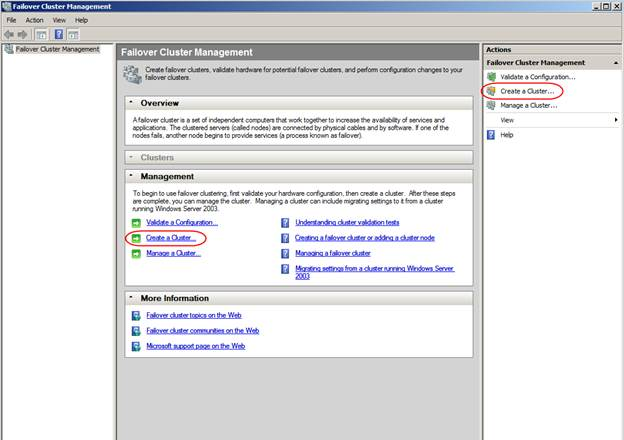 After clicking “Create a Cluster” and clicking Next on the main page you should see the “Access Point for Administering the Cluster”. Here is where you will type in the name of your cluster. This doesn’t need to be your server name. Use a name to distinguish this cluster from other clusters. In this example, I’ll use DenaliCluster.

