SQL Server AlwaysOn – Part 2 – Availability Groups Setup

In Part 1 we configured prerequisites for SQL Server 2012 new AlwaysOn and in Part 2 we’ll go over the fun stuff…configuring the High Availability Groups.

Create Sample Database and Create Backups

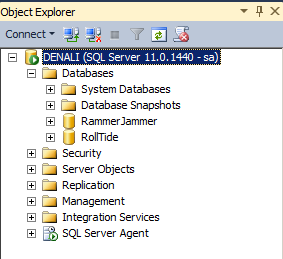
First thing we need to do is connect to the primary server using SSMS and create two databases and back them up to the network share we created. In this example I’ll create database RammerJammer and RollTide and then create database backups.

SQL Freelancer SQL Server AlwaysON

Specify Name

In SSMS go to Management, right click Availability Groups and click New Availability Group Wizard. Once the wizard appears click Next on the main screen and create a unique Availability Group name on the Specify Availability Group Name screen. I’ll name my group AG-Bama and then click Next.

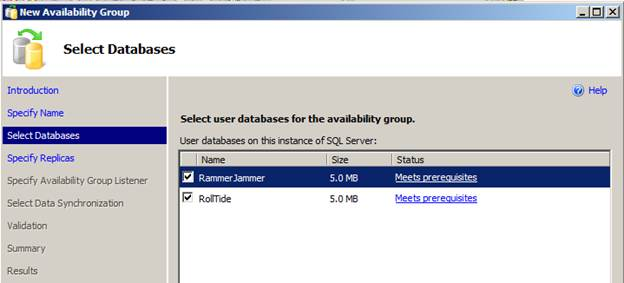
Select Databases

On the next screen we will need to select our databases that we want added to our availability groups. This screen also has a status column that will let us know ahead of time if our databases meet the prerequisites. I’ll select both databases and click Next.SQL Freelancer SQL Server AlwaysON
Specify Replicas

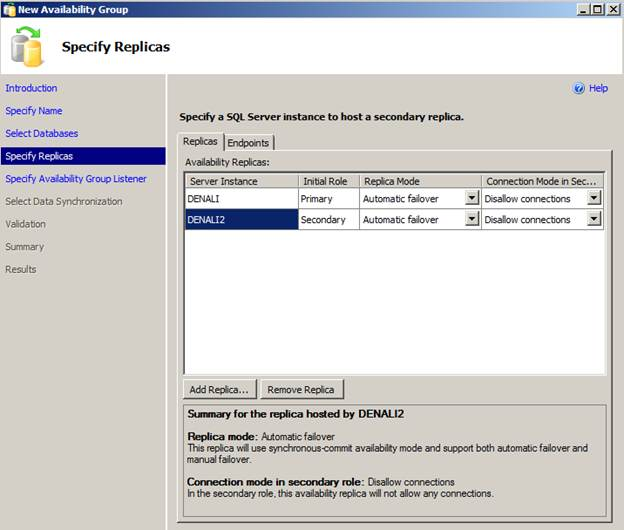
On the next screen click Add Replica… and connect to the other server (Denali2) Replica Mode can be set to Automatic Failover, High Performance, or High Safety.

  • Automatic Failover: This replica will use synchronous-commit availability mode and support both automatic failover and manual failover.
  • High Performance: This replica will use asynchronous-commit availability mode and support only forced failover (with possible data loss).
  • High Safety: This replica will use synchronous-commit availability mode and support only manual failover.

Connection Mode in Secondary Role can be set to Disallow connections, Allow only read-intent connections, or Allow all connections.

  • Disallow connections: This availability replica will not allow any connections.
  • Allow only read-intent connections: This availability replica will only allow read-intent connections.
  • Allow all connections: This availability replica will allow all connections for read access, including connections running with older clients. For this example, I’ll choose Automatic Failover and Disallow connections to my secondary role and click Next.SQL Freelancer SQL Server AlwaysON

Click here to view the rest of this tip.


New SQL Server AlwaysOn Feature – Part 1 configuration

SQL Server has produced some excellent High Availability options, but I was looking for an option that would allow me to access my secondary database without it being read-only or in restoring mode. I need the ability to see transactions occur and query the secondary database.

Enter SQL Server 2012 AlwaysON High Availability Groups.

The new AlwaysOn feature combines the powers of clustering and mirroring into one High Availability option, but also allows you to interact with the secondary databases something that clustering and mirroring do not allow.  In addition, AlwaysOn Availability Groups allows you to configure failover for one database, a set of databases or the entire instance again something you could not do with database mirroring.  Another feature is that you can create multiple failover targets where in the past database mirroring only allowed one failover partner.

In this tip I’ll show you a basic look at how to setup SQL Server 2012 AlwaysON Availability Groups.  Note that this tip is separated into 2 parts: Part 1 will consist of installing and configuring the prerequisites for AlwaysOn and Part 2 will consist of setting up the Availability Groups and showing how they work.

Let’s get started…

Environment:  I have setup two separate VM’s running in VM Workstation with Windows 2008 R2 Enterprise Edition and SQL Server 2008 R2 Enterprise named Denali and Denali2.

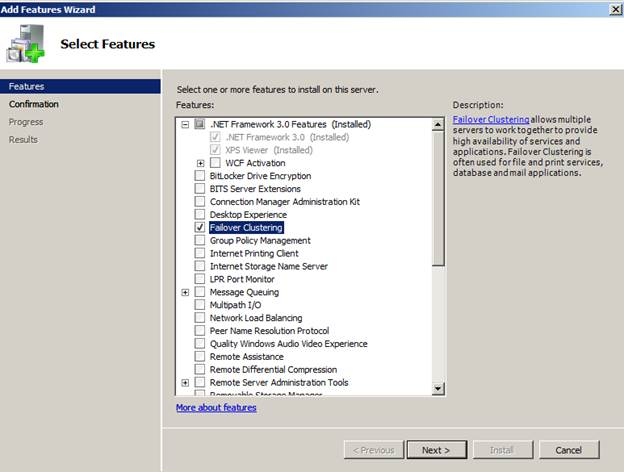
First thing we need to do is make sure both servers have .NET Framework 3.0 Features and Failover Clustering installed. To do this, go to Server Manager, Features, Add Feature. Check .NET Framework 3.0 and Failover Clustering and Install as shown below.

SQL Freelancer SQL Server AlwaysON

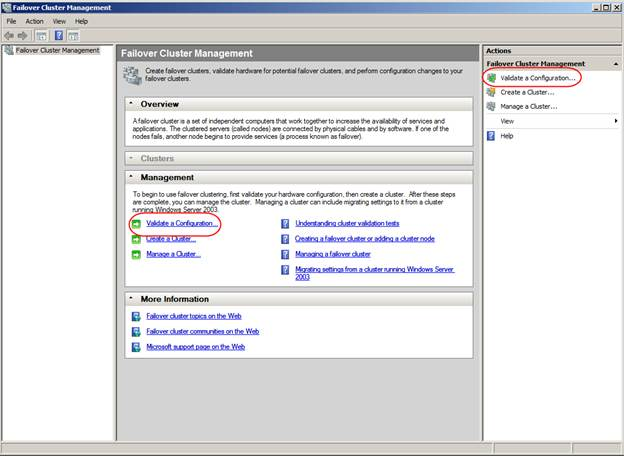
Once .NET and Failover Clustering are installed we can configure the cluster. Go to Control Panel, Administrative Tools, Failover Cluster Manager and click Validate a Configuration.

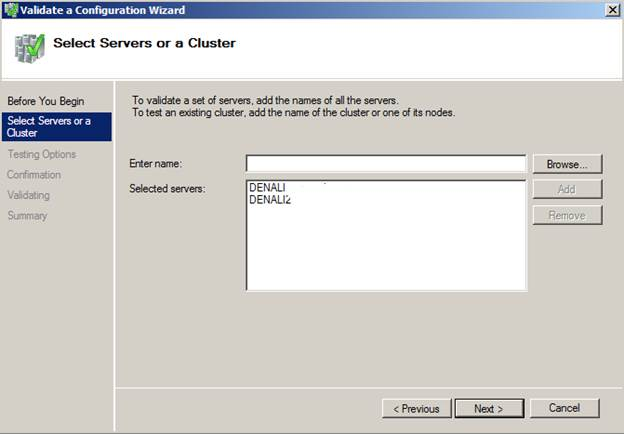
SQL Freelancer SQL Server AlwaysONOn the “Validate A Configuration Wizard” page click Next, then enter the names of the SQL Servers you want to configure. In this example we are using Denali and Denali2.

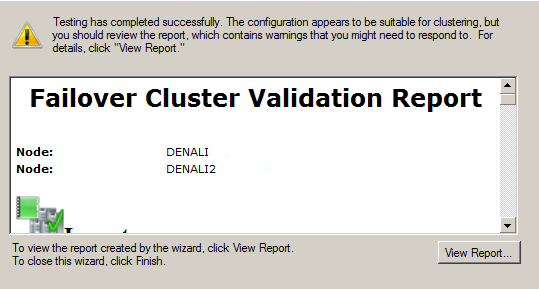
SQL Freelancer SQL Server AlwaysONClick Next to run through some validation tests. If you receive any errors click View Report to view the errors.

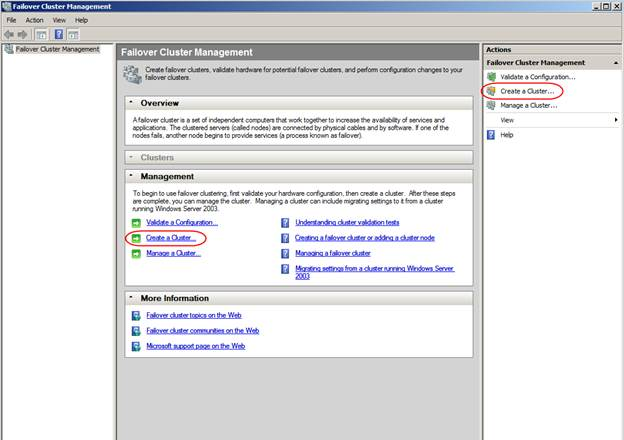
SQL Freelancer SQL Server AlwaysONAs you can see from above I received errors on my validation, because I am only using one network card. This means I have a single point of failure. In a production environment you would want to fix this, but this is only a warning and does not stop us from configuring clustering. From the main screen click “Create a Cluster

SQL Freelancer SQL Server AlwaysONAfter clicking “Create a Cluster” and clicking Next on the main page you should see the “Access Point for Administering the Cluster”. Here is where you will type in the name of your cluster. This doesn’t need to be your server name. Use a name to distinguish this cluster from other clusters. In this example, I’ll use DenaliCluster.

Click here to view the rest of this post.

sp_who

There are numerous ways you can view blocking information but I’ll share the most popular in sp_who and sp_who2.

Like their name implies sp_who and sp_who2 give information about “who” is in your SQL Server as well as other useful information including processes and blocking info.

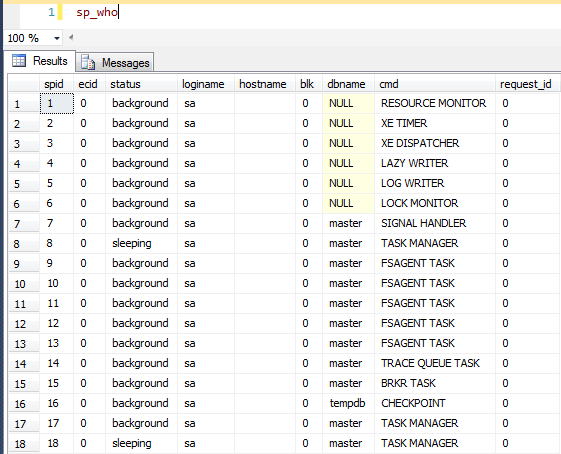
Below is an example of sp_who running against a SQL Server:

SQL Freelancer SQL Server sp_who

As you can see, sp_who will return SPID, status, loginname, blk, dbname, etc.

spid – The system process ID.
ecid – The execution context ID of a given thread associated with a specific SPID.
status – The process status.
loginame – The login name associated with the particular process.
hostname – The host or computer name for each process.
blk – The system process ID for the blocking process, if one exists. Otherwise, this column is zero.

When a transaction associated with a given SPID is blocked by an orphan distributed transaction, this column will return a ‘-2′ for the blocking orphan transaction.
dbname – The database used by the process.
cmd – The SQL Server command (Transact-SQL statement, SQL Server internal engine process, and so on) executing for the process.